

Cake Pop
Table of Contents
how to make starbucks cake pops
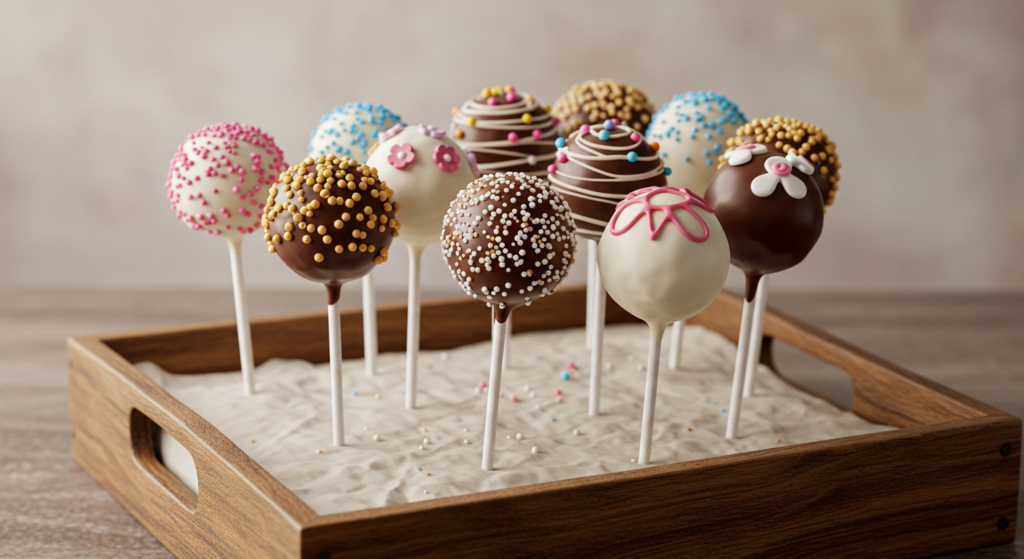
A delectable close-up of freshly baked Starbucks cake pops, their smooth, vibrant coating glistening under soft, diffused lighting. The pops are arranged artistically on a sleek, white marble surface, their petite spherical forms casting gentle shadows. The background is softly blurred, allowing the cake pops to take center stage, their distinctive Starbucks green and brown color palette subtly hinting at the brand. The composition is balanced, with the cake pops positioned at an angle to create visual interest. The lighting accentuates the tempting texture of the cake and the glossy sheen of the coating, inviting the viewer to imagine the delightful flavors and satisfying bite of these beloved Starbucks treats.
Do you love the Starbucks cake pops? Now, you can make them at home. This guide will show you how to make these tasty treats. You’ll learn how to make cake pops that look and taste like the ones from Starbucks.
Cake pops are a hit in the baking world. They let home bakers make desserts that look like they’re from a pro bakery. With a little practice and creativity, you can make cake pops that look amazing, just like Starbucks.
Key Takeaways Cake Pops
- Learn professional cake pop techniques
- Master Starbucks-style decorating methods
- Create delicious homemade cake pops
- Save money by baking at home
- Explore creative flavor combinations
- Develop advanced baking skills
- Impress friends and family with bakery-quality treats
Understanding Starbucks Cake Pops: What Makes Them Special
Starbucks cake pops have won the hearts of many dessert fans. These small treats turn simple cake into a special experience. They mix convenience, taste, and joy in every bite.
The Sweet Origin Story
The story of Starbucks cake pops started with a creative twist. Bakers found a way to use leftover cake to make tasty treats. This idea not only cut down on waste but also created a new favorite dessert.
Irresistible Cake Pop Flavors
Starbucks has a wide range of cake pop flavors for everyone:
- Birthday Cake: A classic vanilla cake with colorful sprinkles
- Chocolate: Rich chocolate cake with decadent coating
- Cookies & Cream: Crushed cookie-infused cake
- Seasonal Special Editions: Holiday-themed cake pop flavors
Why Cake Pops Became a Sensation
These small treats are loved for many reasons. They’re easy to carry, just the right size, and give a quick sweet treat. The cake pop flavors let customers try new tastes without a big dessert.
Starbucks made the cake pop a global hit. It’s a story of turning a simple idea into a worldwide delight.
Essential Ingredients for Homemade Starbucks-Style Cake Pops
Starting your cake pop journey means picking the right ingredients. You need a list of ingredients that will turn simple items into tasty treats.
The base of a great cake pop is high-quality ingredients. You’ll need:
- Cake mix (vanilla or chocolate)
- Buttercream frosting
- Candy melts or chocolate coating
- Cake pop sticks
When picking ingredients Cake Pop Recipe, remember these important points:
- Cake Base: Choose a moist cake mix that breaks down easily. Boxed mixes are great for beginners.
- Binding Agent: Frosting holds the cake crumbs together, making the pop’s texture just right.
- Coating: Candy melts give your cake pops a smooth, professional look.
Pro tip: Use room temperature ingredients for the best mix. Cold cake and frosting can make mixing hard.
The secret to perfect cake pops is finding the right balance of moisture and texture.
Don’t forget about dietary needs. Gluten-free cake mixes and vegan frostings can replace regular ingredients. This way, everyone can enjoy these treats.
Required Tools and Equipment for Perfect Cake Pops
Making cake pops is fun with the right tools. Whether you’re new or experienced, the right gear makes it easier and more fun.
A well-organized collection of cake pop making equipment, including a silicone baking tray with rounded indentations, a sturdy cake pop maker machine with heating elements, an assortment of colorful candy melts, a set of decorative sticks, and a variety of sprinkles and toppings. The tools are arranged on a clean, white countertop, softly illuminated by natural lighting from a large window, creating a welcoming and professional atmosphere. The overall scene conveys a sense of preparation and attention to detail, perfectly suited for the “Required Tools and Equipment for Perfect Cake Pops” section of the article.
To start making top-notch cake pops, you need the right tools. Your cake pop maker and mold are key. They help you make treats that look great and taste even better.
Cake Pop Sticks and Molds
Choosing the right cake pop sticks and molds is important. Here are some top picks:
- Food-grade plastic cake pop sticks (6-inch length recommended)
- Silicone cake pop molds with various shape options
- Non-stick cake pop molds for easy removal
- Sturdy metal or plastic cake pop stands for drying
Melting and Dipping Tools
For a smooth coat, you need special melting tools. Get these:
- Double boiler or microwave-safe melting bowls
- Chocolate melting pot with temperature control
- Silicone spatulas for smooth mixing
- Candy thermometer for precise temperature monitoring
Decorating Equipment Essentials
Decorating makes your cake pops look amazing. You’ll need:
- Piping bags with various tip sizes
- Edible food coloring gels
- Decorative sprinkles and edible glitter
- Small offset spatula for smooth coating

With quality cake pop equipment, you’re ready to make treats as good as Starbucks.
Cake Pop Recipe: Step-by-Step Baking Instructions
Making the perfect cake pop recipe needs precision and baking skills. Your journey to delicious cake balls begins with the right ingredients and a detailed method. It’s more than mixing ingredients; it’s an art that requires practice and patience.
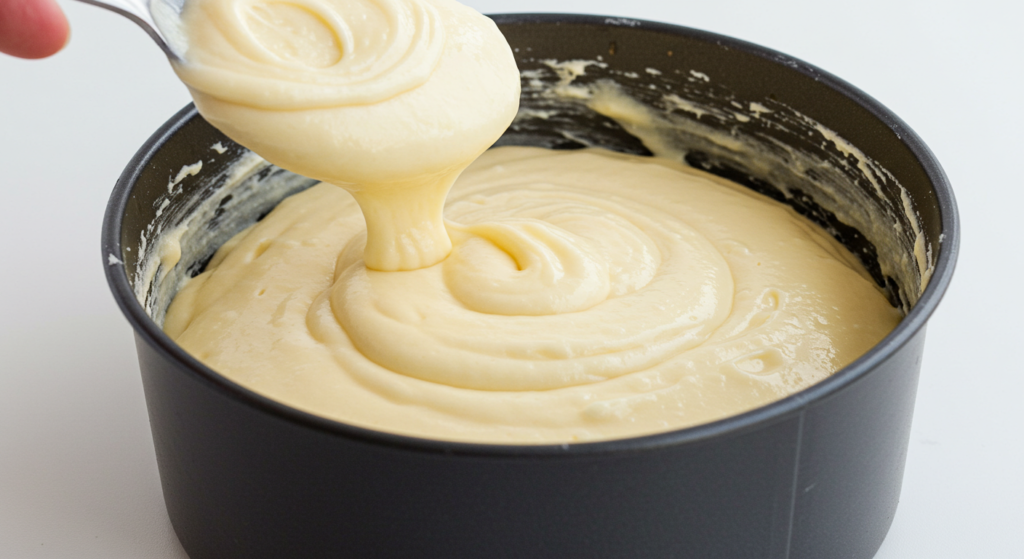
A pristine kitchen counter bathed in warm, natural lighting, showcasing the meticulous process of baking cake pops. In the foreground, a platter of freshly baked cake balls, their golden-brown exteriors glistening. Beside them, a bowl of creamy frosting and an array of colorful sprinkles, ready to be meticulously applied. In the middle ground, skilled hands carefully dipping the cake balls into the frosting, creating a smooth, even coating. In the background, a stand mixer whirring, whisking together the fluffy cake batter, the perfect foundation for these bite-sized treats. The overall scene exudes a sense of homemade comfort and attention to detail, capturing the essence of the Starbucks cake pop-making experience.
Start your cake pop adventure by gathering these essential ingredients:
- 1 box cake mix (vanilla or chocolate)
- 1 container of frosting
- Candy melts or chocolate for coating
- Cake pop sticks
The core of any successful cake pop recipe involves these critical steps:
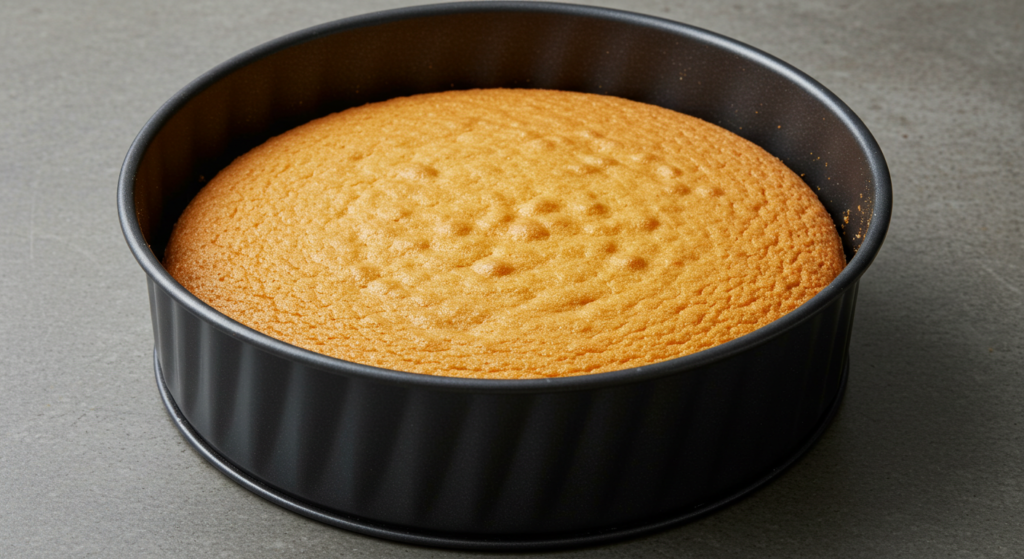
- Bake the cake according to package instructions
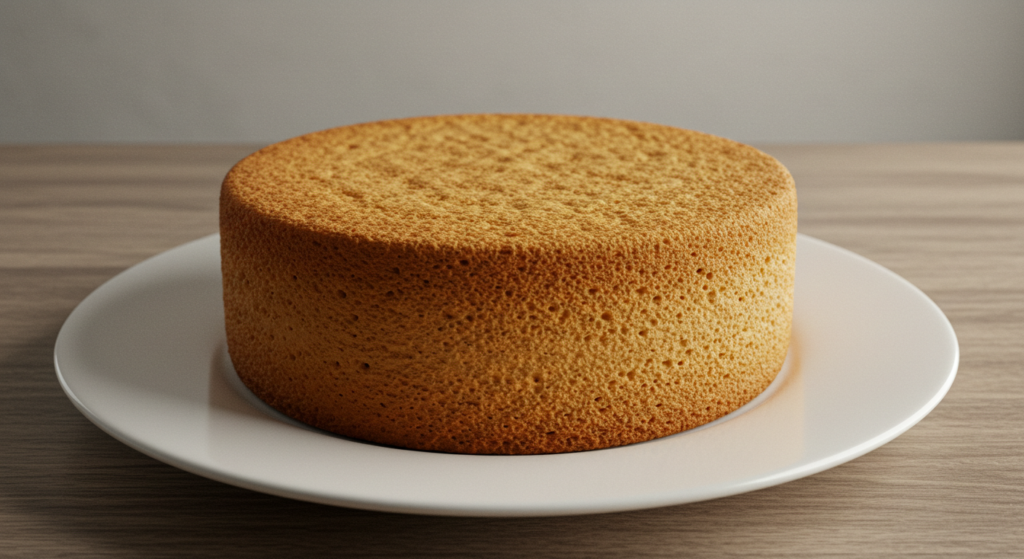
- Allow cake to cool completely
- Crumble cake into fine crumbs
- Mix crumbs with frosting until moldable
“The secret to perfect cake pops is achieving the right consistency – not too dry, not too wet.”
When preparing your cake ball recipe, aim for a texture that holds together when rolled into balls. Your mixture should be moist enough to stick but firm enough to maintain shape.
| Baking Step | Time Required | Key Tip |
| Cake Baking | 30-35 minutes | Use room temperature ingredients |
| Cooling | 1-2 hours | Ensure complete cooling before crumbling |
| Mixing Crumbs | 10-15 minutes | Add frosting gradually |
Pro tip: Refrigerate your cake ball mixture for 15-20 minutes before shaping to make it easier to handle.
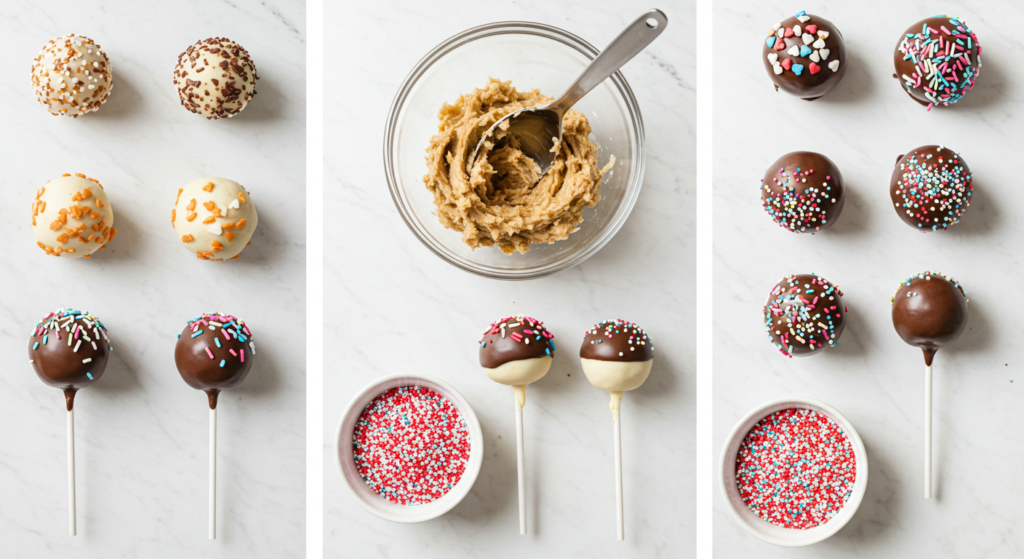
Creating the Perfect Cake Ball Mixture
Making the perfect cake ball recipe takes skill and patience. Your cake ball mix is key to making delicious cake pops that wow everyone. Learning the right way can turn your homemade treats into pro-quality ones.
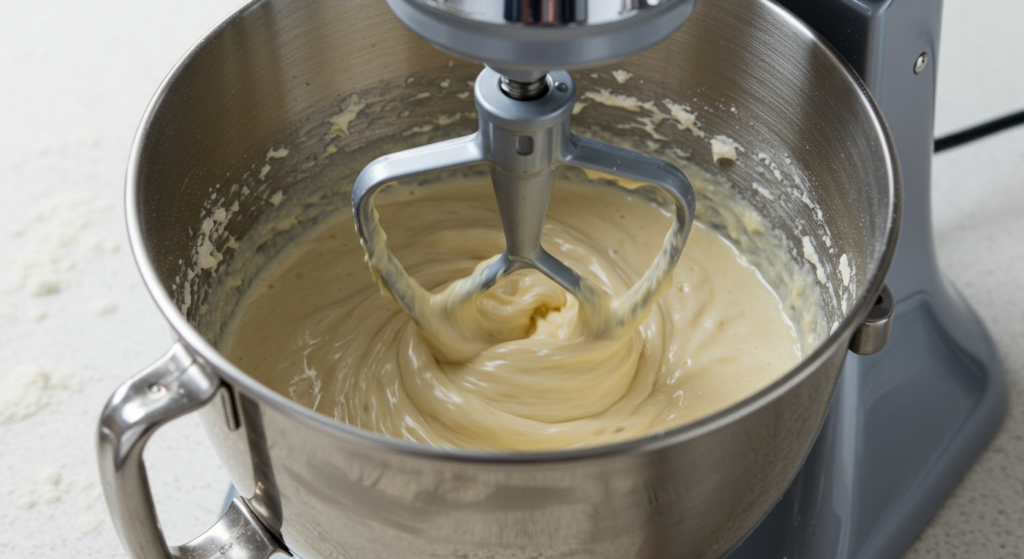
A stainless steel mixing bowl filled with a rich, creamy cake batter mixture. Bathed in warm, natural lighting, the batter has a thick, velvety texture, laced with flecks of vanilla bean. An electric hand mixer hovers above, its whisk blades gently folding the ingredients together. In the foreground, a handful of chocolate chips and a dusting of powdered sugar add pops of color and texture. The background is a soft, blurred kitchen counter, suggesting a cozy, home-baked atmosphere. The entire scene conveys a sense of care and attention to detail in the process of creating the perfect cake ball mixture.
The secret to a great cake ball recipe is getting the right texture and consistency. Your mix should be moist but not too wet, so it holds together well.
Proper Consistency Tips
- Crumble cake completely, removing any hard edges
- Add frosting gradually to control moisture
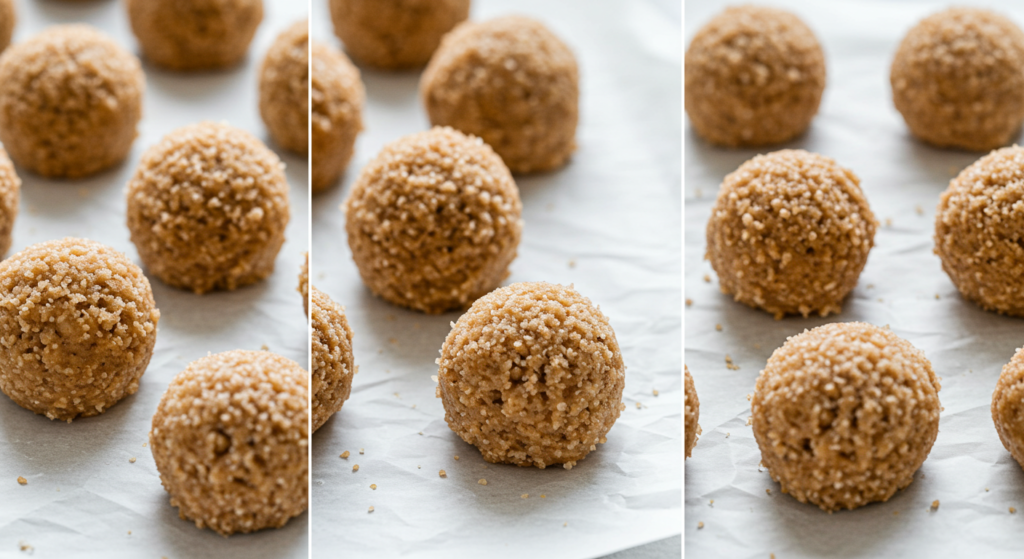
- Mix until the cake ball mixture can be shaped without crumbling
- Aim for a play-dough like consistency
Troubleshooting Texture Issues
If your cake ball mix is too dry, add a bit of frosting. If it’s too wet, add more cake crumbs. Precision is key for the perfect texture.
Chilling and Setting Guidelines
After shaping your cake balls, chill them for at least 30 minutes. This step is crucial for keeping them in shape while dipping. Cold cake balls are easier to coat and less likely to break apart.
- Chill cake balls on a parchment-lined baking sheet
- Ensure cake balls are evenly sized for consistent results
- Use a cookie scoop for uniform sizing
Master these techniques, and you’ll make cake pops that compare to those in professional bakeries.
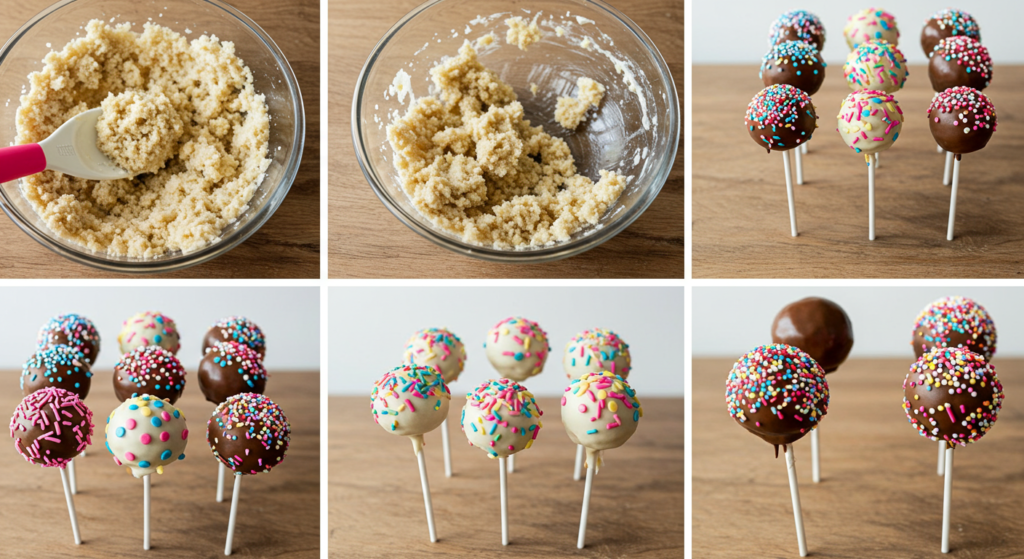
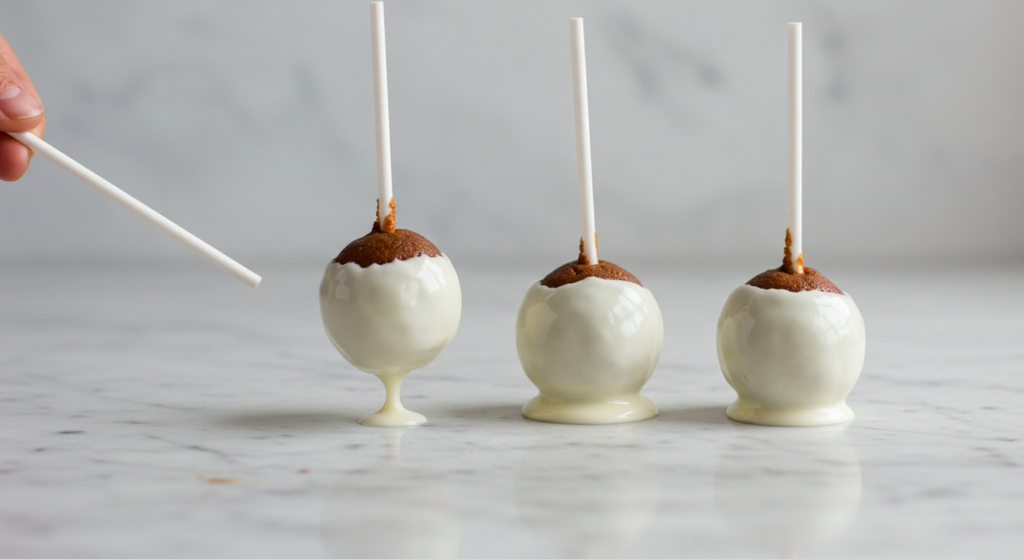
Mastering the Coating Technique

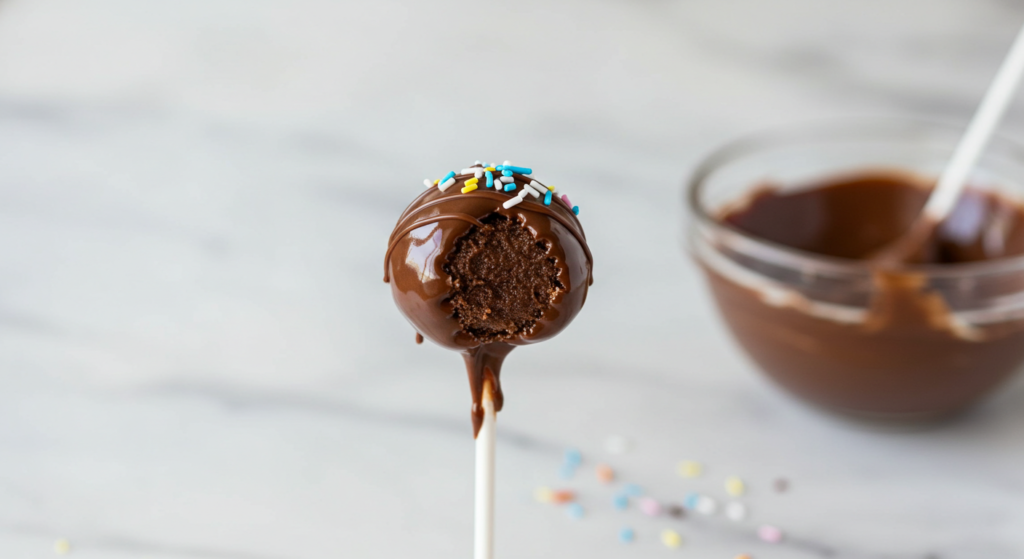
A close-up, high-resolution photograph of various cake pop coating techniques. In the foreground, a selection of cake pops with a smooth, glossy coating in different colors – vibrant pink, luscious chocolate, and silky white. The middle ground showcases the coating application process, with a hand dipping a cake pop into a bowl of melted chocolate. The background features an array of baking tools and ingredients, such as sprinkles, piping bags, and a marble countertop, creating a professional, culinary-inspired atmosphere. Soft, natural lighting highlights the texture and sheen of the coatings, and a shallow depth of field draws the viewer’s focus to the intricate details of the cake pops.
Getting a perfect cake pop coating takes skill and patience. The right method turns simple cake balls into treats that look great and taste amazing.
Before you start coating, focus on three key things:
- Chocolate temperature control
- Dipping methodology
- Excess coating removal
Choosing the right coating is key for success. Candy melts and chocolate are top picks, each with its own benefits for coating.
| Coating Type | Melting Temperature | Texture |
| Candy Melts | 100-110°F | Smooth, vibrant colors |
| Chocolate | 86-90°F | Rich, glossy finish |
Your technique should be gentle and careful. Hold the cake pop at a 45-degree angle. Let excess coating drip off. Tap the stick to remove more drips.
Pro tip: Keep your coating at a steady temperature. Avoid adding moisture to prevent cracking or streaks.
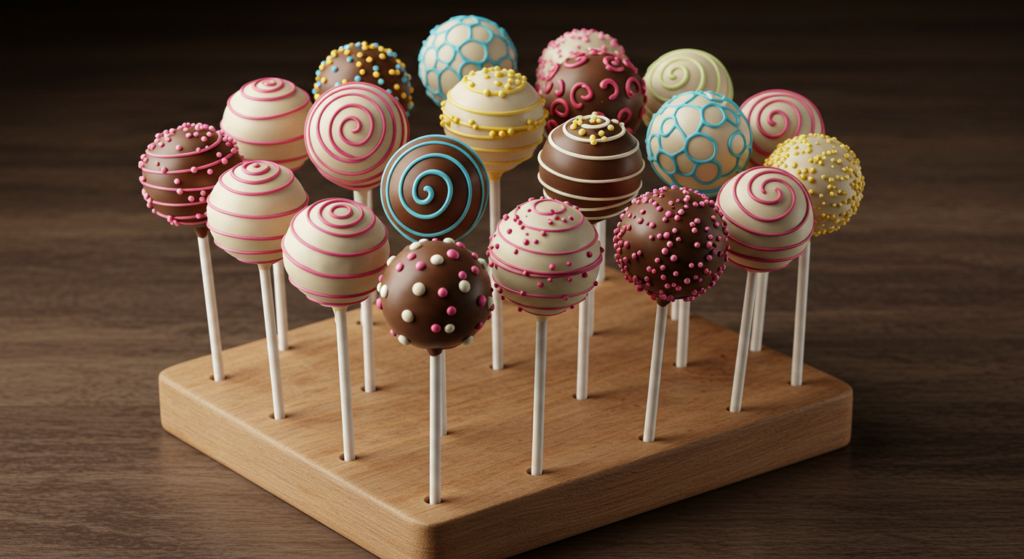
Professional Decorating Tips and Designs cake balls
To improve your cake pop decorating, you need creativity, precision, and some pro techniques. Whether you want to make Starbucks-style cake pops or your own designs, learning decoration can turn simple treats into eye-catching wonders.

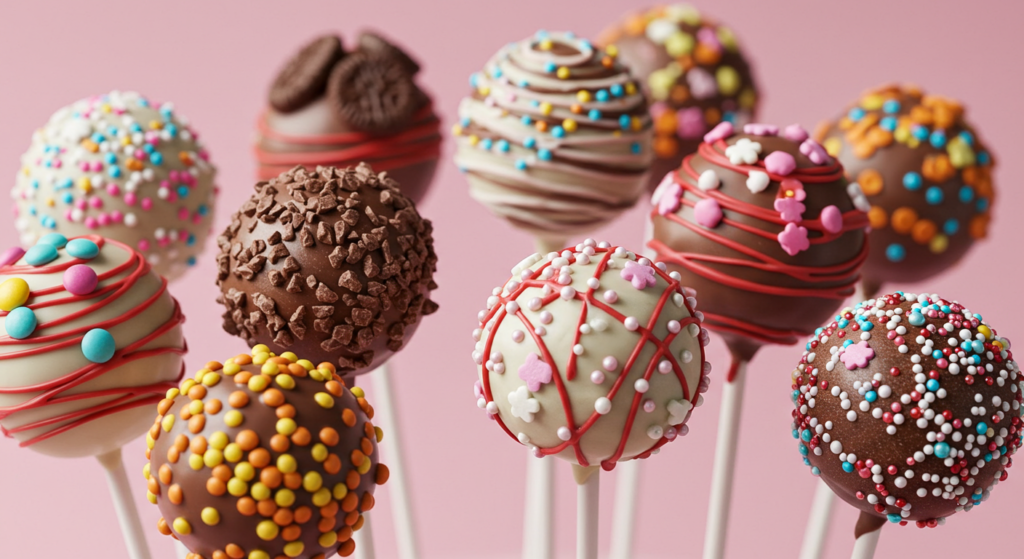
A beautifully styled overhead shot of an array of expertly decorated cake pops on a pristine white surface. The pops are adorned with intricate swirls, polka dots, and colorful sprinkles, showcasing a range of professional decorating techniques. Soft, diffused studio lighting casts gentle shadows, highlighting the textural details of the fondant and chocolate coatings. The composition is balanced and visually captivating, inviting the viewer to imagine the delightful flavors and artistry of these delectable confections.
Professional decorating involves key strategies for top-notch results. Knowing about color, texture, and design will make your cake pops stand out from others.
Color Matching Starbucks Styles
To get the Starbucks cake pop look, pick colors carefully. Here are some tips for matching colors:
- Use gel food coloring for bright, even colors
- Match Starbucks’ colors with precision
- Blend colors smoothly for a perfect coat
Seasonal Decoration Ideas
Seasonal decorating lets you show off your creativity and capture holiday vibes. Here are some ideas:
| Season | Decoration Technique | Color Scheme |
| Winter | Snowflake piping | White, silver, blue |
| Spring | Pastel flower designs | Soft pink, lavender, mint |
| Summer | Tropical patterns | Bright yellow, turquoise, coral |
| Autumn | Leaf and pumpkin motifs | Rust, orange, deep green |
Advanced Piping Techniques
Master advanced decorating by learning intricate piping. Start with basics and then get better:
- Learn to control pressure
- Try different nozzle sizes
- Play with royal icing consistency
- Work on steady hand movements
Pro tip: Always keep your tools clean and get high-quality bags and tips for pro-looking cake pops.
Storage and Shelf Life Best Practices
Keeping your homemade cake pops fresh is key. The right storage keeps them tasting great and looking good. This way, you can enjoy them for a long time.
Temperature and packaging are important when storing cake pops. At room temperature, they stay fresh for 3-4 days in an airtight container. If you want to keep them longer, the fridge is your best bet.
- Short-term storage: Keep cake pops in a sealed container at room temperature
- Refrigeration: Extends shelf life up to 1 week
- Freezing: Potential storage for up to 6 weeks
Refrigeration needs some extra care. Wrap each cake pop in plastic wrap first. Then, put them in a sealed container. This keeps moisture away and saves the candy coating.
Freezing cake pops requires careful steps:
- Allow cake pops to cool completely
- Wrap individually in plastic wrap
- Place in a freezer-safe container
- Label with date of preparation
Pro tip: When ready to serve frozen cake pops, thaw them slowly in the refrigerator. This keeps their texture right and prevents moisture.
Good packaging is vital for your cake pops. Use clear cellophane bags or cake pop containers. They protect your treats and show off their design.
Troubleshooting Common Cake Pop Problems
Making the perfect cake pop recipe can be tough, even for pros. When baking cake pops, you might face several common issues. These problems can stop your dessert project from being a hit.
Let’s look at some common cake pop problems and how to fix them:
- Falling Cake Balls: If your cake balls fall off the stick, it’s a consistency problem. Make sure your cake mix is cold and firm. Mix cake crumbs with just enough frosting to make them moldable.
- Cracking Coating: Temperature is key in your cake pop recipe. When dipping, keep your candy melts at a smooth, lukewarm temperature. This helps avoid a cracked coating.
- Uneven Surface: Tap your cake pop gently after dipping to remove excess coating. Stand them upright on a styrofoam block while they set.
Many cake pop makers struggle to get that perfect look. The secret is patience and practice. Remember, your first few tries might not be perfect.
Pro tip: Always keep your workspace clean and your ingredients at the right temperature for the best cake pop recipe results.
When things go wrong, think outside the box. Use cracked or misshapen cake pops as cake pop crumbles for ice cream or as a cake garnish.
Customizing Your Cake Pops: Flavor Variations and Creative Ideas
Creating unique cake pop flavors is all about being creative and trying new things. By turning classic recipes into something new, you can make cake pops that amaze and impress everyone.
Begin by trying out different cake pop flavors that go beyond vanilla and chocolate. Here are some ideas to get you started:
- Seasonal fruit-inspired cake pop flavors
- Gourmet chocolate and spice blends
- Unique cultural flavor inspirations
- Decadent dessert-themed cake pops
When making cake pop flavors, don’t be afraid to mix things up. Try adding lavender-infused white chocolate, salted caramel, or chai spice to your cake pops. These ingredients can turn simple treats into something truly special.
| Flavor Category | Unique Combinations | Recommended Coating |
| Classic Remix | Red Velvet Cheesecake | Cream Cheese Drizzle |
| Tropical Twist | Coconut Mango | White Chocolate |
| Decadent Dessert | Tiramisu | Dark Chocolate |
Don’t forget that how your cake pops look is just as important as how they taste. Try out different colors, decorations, and toppings to make your cake pops visually stunning.
Conclusion: Mastering the Art of Starbucks-Style Cake Pops
Making cake pops at home is a fun adventure that mixes creativity with skill. You’ve learned how to make cake pops that are as good as Starbucks’. You know how to pick the best ingredients, coat them perfectly, and decorate them beautifully.
Creating cake pops is more than just a recipe. It’s a chance to show your creativity and make others happy. Every batch you make will help you get better, try new flavors, and find your own style. Don’t hesitate to try new things and mix flavors to make your cake pops stand out.
Remember, making cake pops takes practice. Your first tries might not look perfect, but each batch will get better. The key is your love for baking and your desire to learn. With patience and creativity, you’ll soon make cake pops that are not only tasty but also beautiful.
Enjoy the journey, have fun, and share your cake pops with loved ones. Your skills will surely impress everyone, making these treats unforgettable moments of joy.
FAQ cake pops
What ingredients do I need to make Starbucks-style cake pops?
To make Starbucks-style cake pops, you’ll need a cake mix, frosting, and candy melts or chocolate coating. Also, cake pop sticks and optional sprinkles or edible decorations are needed. Choose high-quality ingredients for a moist, flavorful cake pop with a smooth finish.
How long do homemade cake pops stay fresh?
Homemade cake pops stay fresh for 3-4 days at room temperature. They can last up to 1 week in the fridge. For longer storage, freeze them for 4-6 weeks. Make sure to wrap each pop individually to keep them fresh.
Can I make cake pops without a cake pop maker?
Yes, you can make cake pops without a cake pop maker. Use a traditional baked cake, crumbled and mixed with frosting. Chill the mixture, form into balls, and dip in coating using cake pop sticks. This method offers more flexibility and creativity.
What are the most common coating options for cake pops?
The most popular coatings include candy melts, white chocolate, milk chocolate, and dark chocolate. Each offers a different flavor and finish. Candy melts are especially popular for their vibrant colors and easy melting.
How do I prevent cake pops from falling off the stick?
To prevent cake pops from falling, dip the stick in melted chocolate before inserting it. Make sure the cake ball is chilled and firm. Don’t overload it with too much coating. A thin, even coating helps keep the cake pop balanced on the stick.
Are there gluten-free or vegan cake pop options?
Yes, there are gluten-free and vegan cake pop options. Use gluten-free cake mixes or alternative flour blends for gluten-free pops. For vegan options, use plant-based cake mixes, dairy-free frosting, and vegan chocolate or candy melts. Many brands now offer these alternatives.
What’s the best way to decorate cake pops?
The best decorating techniques include drizzling chocolate, using sprinkles, and applying edible glitter. You can also create intricate piped designs. Use food coloring to match seasonal or themed events.
How do I store cake pops for gifting?
For gifting, wrap each cake pop in clear cellophane bags tied with decorative ribbons. Store them in a cool place. Use a styrofoam block to keep them upright during transport. Refrigerate if not serving immediately, but let them come to room temperature before serving.
Best cake pop recipe 2025
Description
"This easy cake pop recipe transforms crumbled cake and frosting into delicious, bite-sized treats coated in chocolate or icing. Perfect for birthdays, parties, or as a fun dessert, these cake pops are simple to make and endlessly customizable with different flavors, colors, and toppings. Whether dipped in white, dark, or milk chocolate, they’re sure to be a hit!"
Ingredients
frosting cake
25 ounces (680g) candy melts ,or white chocolate bars.
Nutrition Facts
Servings 1
Note
Chill cake balls before dipping to prevent cracking. Use melted chocolate to secure sticks. Let excess coating drip off for a smooth finish. Decorate quickly before the coating sets for best results!
2 Comments